
Lay the pieces on real slabs
Place every part of the drawing on photos of the actual slabs, check overlaps and yield, and save a layout the shop can cut from.
The slab layout puts the pieces of your drawing on photos of the real slabs. You see exactly which part of the stone each piece comes from, catch overlaps before cutting, and get the slab count and yield. Saving the layout also reserves the inventory slabs you used for the job.
Before you start
- Slab layout needs the Pro plan (feature Slab Layout on Photos, 3D & Approval).
- The quote or job needs a saved drawing with pieces. Until then, the page says "Draw the countertops first" with an Open the drawing button. See Draw the countertops.
- Split pieces that are bigger than a slab with a seam in the drawing, not here. See Match the veining and place seams.
Open the slab layout
- Open the job and click Slab layout at the top. On a quote, the button is in the same place. From the drawing, click ▦ Slab layout.
- The page opens in the ▦ Slabs view. Your first slab is a generic slab named after the job's material, with the material's photo if it has one.
On a quote, the layout uses the first material option (or the accepted one). Saving it reprices the quote, and the countertop preview appears on the customer's quote page. The layout is copied to the job when the quote is accepted.
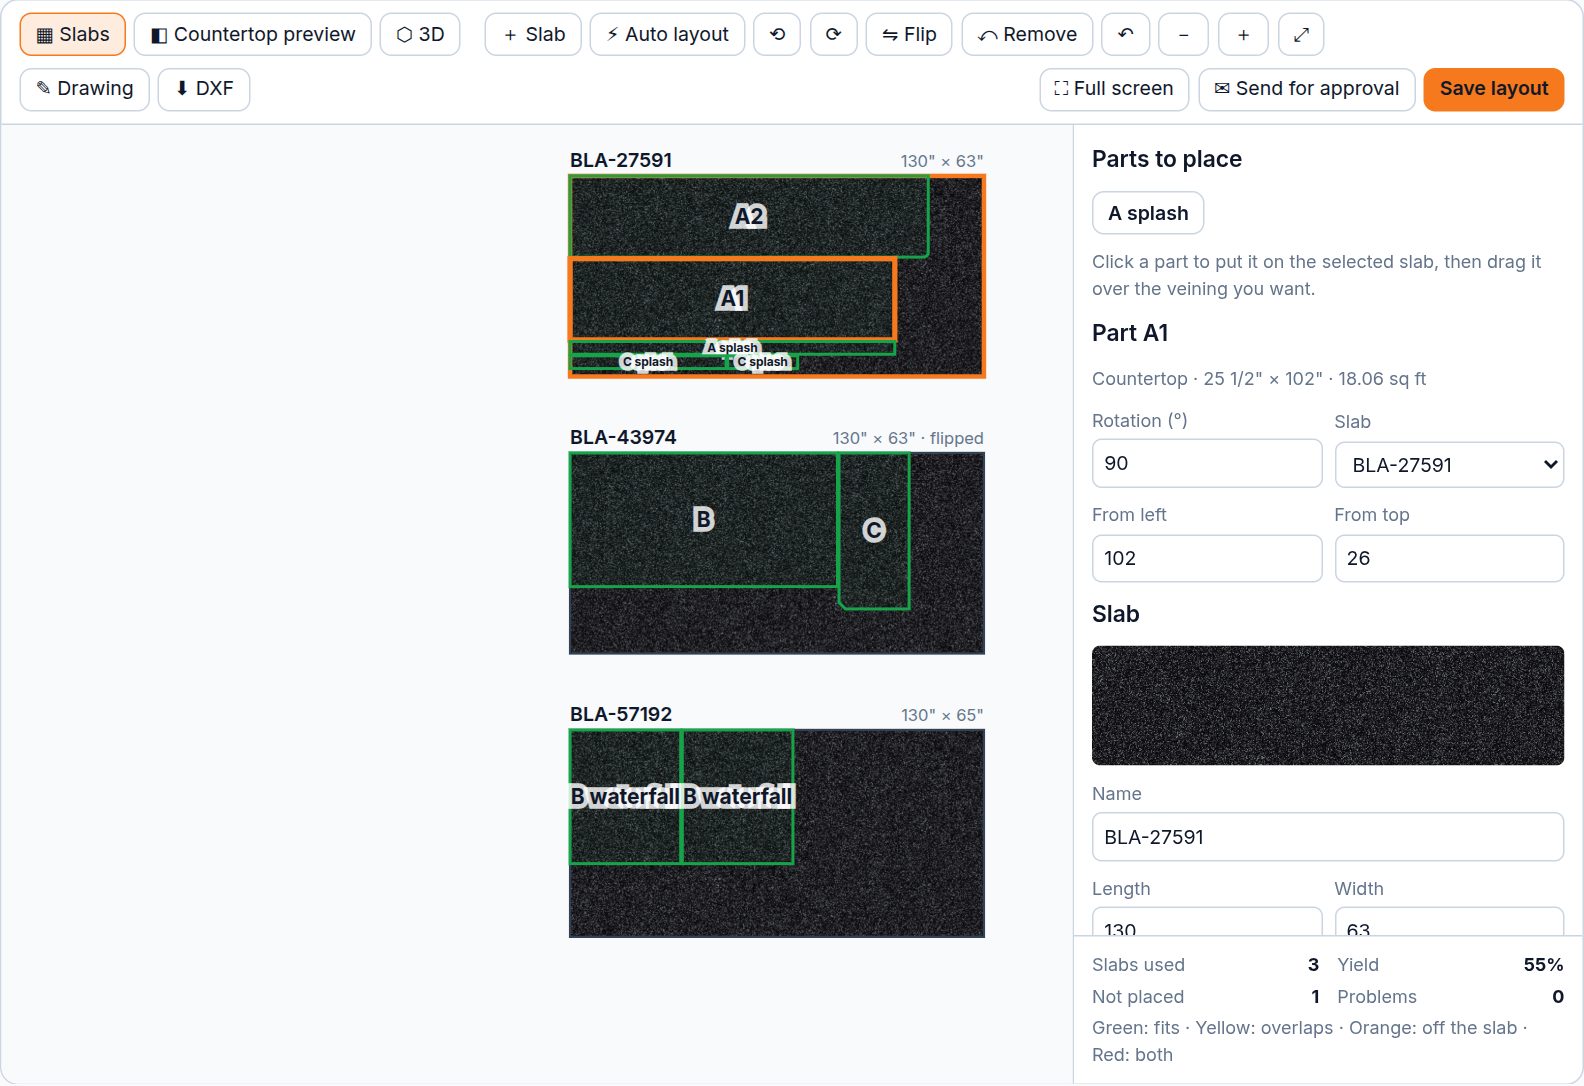
Add slabs and photos
- Click + Slab. The Add a slab window lists inventory slabs of this material that are available or already on this job (remnants first), with photo, tag, size and lot.
- Click a slab to add it, or click + Generic slab (L × W) if the slab isn't in inventory.
- With the slab selected, use the Slab panel on the right:
- 📷 Add photo (or Replace photo): pick a photo of the slab. Big phone photos are shrunk for you. The crop window opens right after the upload.
- ✂ Crop to slab: drag the box over the usable stone and resize it from the bottom-right corner. The box keeps the slab's proportions, so the photo is to scale. Click Apply, or Use the whole photo.
- Name, Length and Width: fractions like
126 1/2work. - ⧉ Next slab adds another slab of the same lot, flipped. ⇋ Bookmatch (flip) mirrors the photo.
- Remove slab removes the slab and takes its parts off.
Place the parts
- Click a slab to select it.
- Under Parts to place, click a part. It goes to the first free spot on the selected slab, turned 90° if it only fits that way.
- Drag the part over the veining you want. It snaps to ¼". Drag it onto another slab to move it there.
- To be exact, select the part and type Rotation (°), Slab, From left and From top (inches) in the Part panel.
- Use ⟲ / ⟳ to rotate, ⇋ Flip to mirror a part, and ⤺ Remove to take it off the slab.
Check the summary
The Summary box shows Slabs used, Yield, Not placed and Problems. Part colors tell you what's wrong:
| Color | Meaning |
|---|---|
| Green | Fits |
| Yellow | Overlaps another part |
| Orange | Goes off the slab |
| Red | Both |
Important: Dragging by hand does not leave room for the saw blade. Keep a gap between parts yourself. Only ⚡ Auto layout (Premium) leaves a ¼" kerf.
Save the layout
Click Save layout (or press Ctrl+S). SlabBoard saves the layout with two images: the slab sheet (each slab with its parts outlined and labeled) and the countertop preview. You see "Slab layout saved" with the slab count, yield and how many inventory slabs were reserved.
- Each job has one layout. Saving again replaces it.
- Inventory slabs on a job layout change from Available to Reserved for that job.
Good to know: Removing an inventory slab from the layout does not release it. Release it in the job's Slabs tab.
Keyboard, mouse and touch
| Action | How |
|---|---|
| Save | Ctrl+S (Cmd+S on Mac), works even while typing in a field |
| Undo | Ctrl+Z (there is no redo here) |
| Rotate 90° clockwise / counter-clockwise | R / Shift+R |
| Flip the selected part | F |
| Take the part off the slab | Delete or Backspace |
| Nudge ¼" / 1" | Arrow keys / Shift+Arrow keys |
| Zoom | Mouse wheel (zooms at the pointer), or - / +; ⤢ fits everything |
| Pan | Drag an empty spot or a slab |
| Phone or tablet | One finger drags parts, pinch to zoom, two fingers to pan |
Good to know: In the drawing editor F fits the drawing. Here F flips the part.
Related
Still stuck?
Write to us and a real person will answer. [email protected]