
Match the veining and place seams
Put seams where they look best, bookmatch slabs and line up the veining across pieces, then check the result on the countertop preview.
On veined stone, where a seam falls and how the veins run across it is what the customer notices. In SlabBoard you set seams in the drawing, then move each part over the slab photo until the veining lines up, and check the result on the ◧ Countertop preview.
Before you start
- Seams are part of the drawing, on every plan. Placing parts on slab photos and the countertop preview need the Pro plan.
- Each slab needs a photo cropped to its edges. See Lay the pieces on real slabs.
Add a seam in the drawing
- Open the drawing and click the piece.
- Open the Seams tab.
- Click + Seam across (│) for a seam across the depth, or + Seam along (─) for a seam along the length.
- Drag the red dashed seam on the drawing to where you want it, or type From left (or From back) in inches.
- Click Save drawing.
The piece is now cut into parts. Piece A with one seam becomes parts A1 and A2 in the slab layout. Splashes and waterfalls are always separate parts, like A splash or B waterfall.
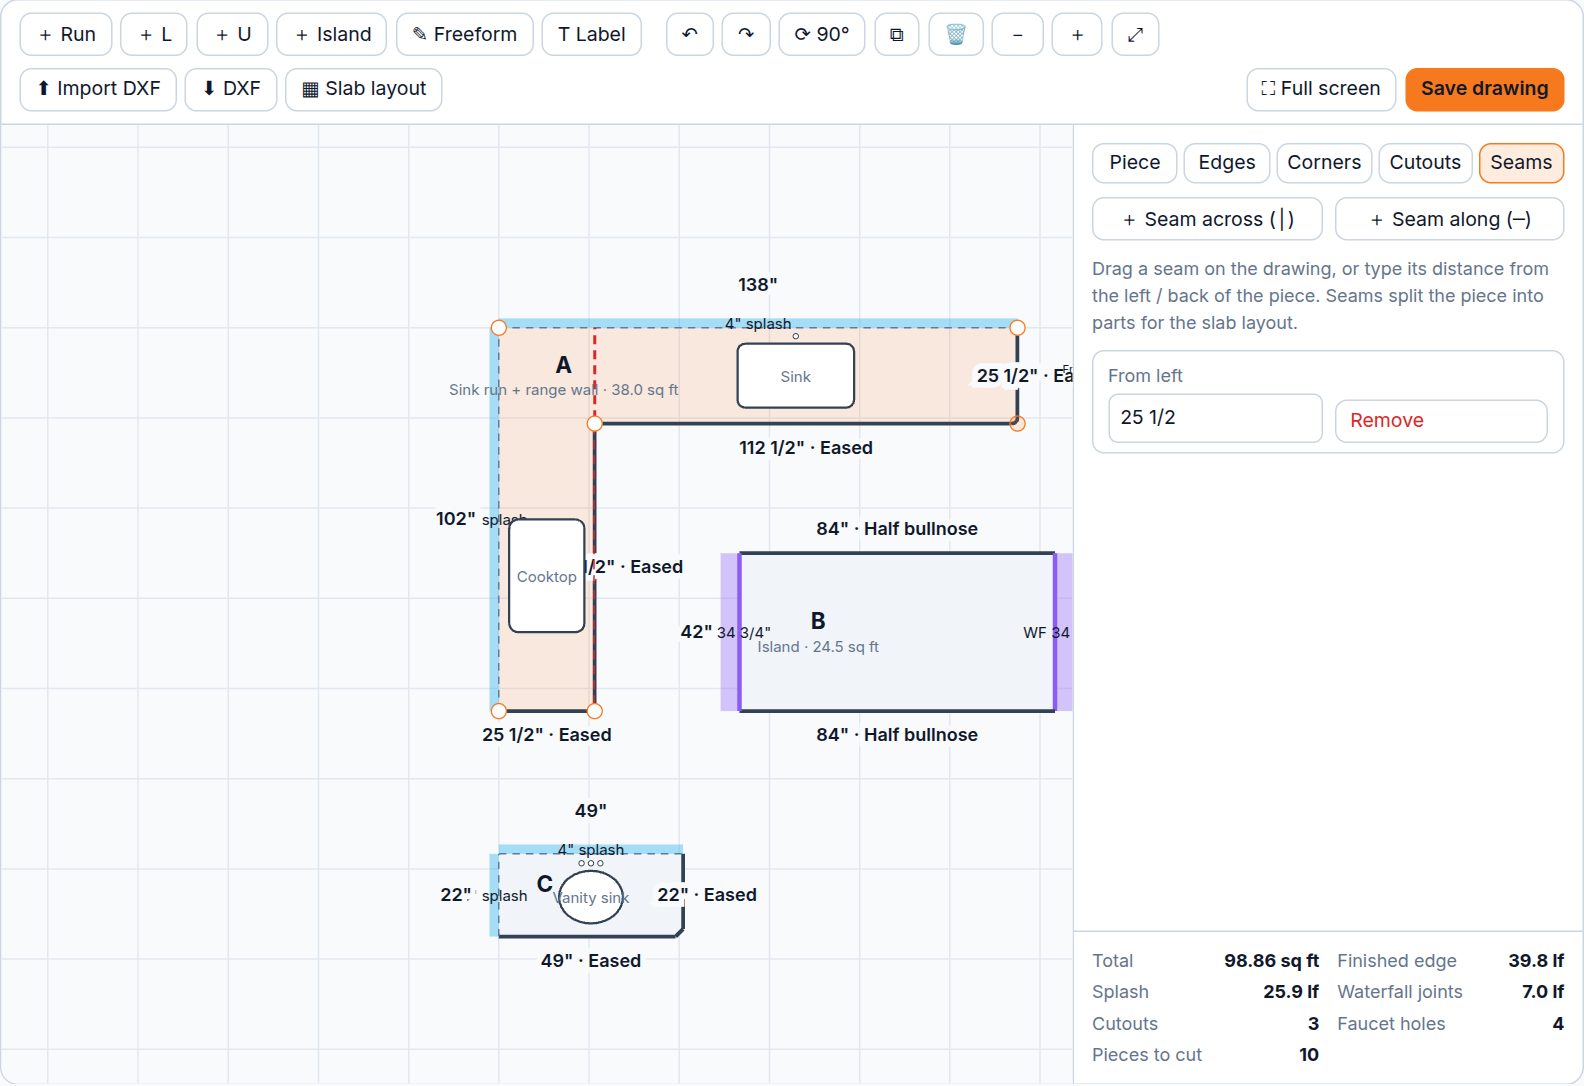
Tip: If the slab layout says a part is bigger than the slab, go back to the drawing and add a seam to that piece. You can't split a part in the slab layout.
Important: Seams split the countertop, not its backsplash. A splash is always one part as long as its edge. If a splash is longer than your slabs, open that edge in the Edges tab and click Add a corner in the middle. The edge becomes two edges, each with its own splash, so you get two shorter splash parts.
Line up the veining
- Open the slab layout and select the slab.
- Place the parts that meet at the seam (for example A1 and A2).
- Drag each part over the part of the stone you want. The photo shows under the part, so you can follow a vein from one part to the next.
- Use the arrow keys to nudge ¼" at a time, or Shift+Arrow for 1".
- Switch to ◧ Countertop preview to see how the two parts meet. Go back to ▦ Slabs to adjust.
Bookmatch two slabs
Bookmatched slabs are cut from the same block and polished on opposite faces, so the second slab is a mirror image of the first.
- Select the first slab (with its photo).
- Click ⧉ Next slab. SlabBoard adds a copy of the slab with the same photo, flipped, named "… (next)".
- If you added the second slab another way, select it and click ⇋ Bookmatch (flip) to mirror its photo. Click Unflip to undo it.
- To mirror a single part instead, select it and click ⇋ Flip (or press F).
Check the result
Click ◧ Countertop preview. You see the drawing with each part filled with the stone from exactly where it sits on the slab. Seams show as red dashed lines. Parts not placed yet show in light gray, and cutouts in white. Splashes and waterfalls are drawn folded out next to their edge.
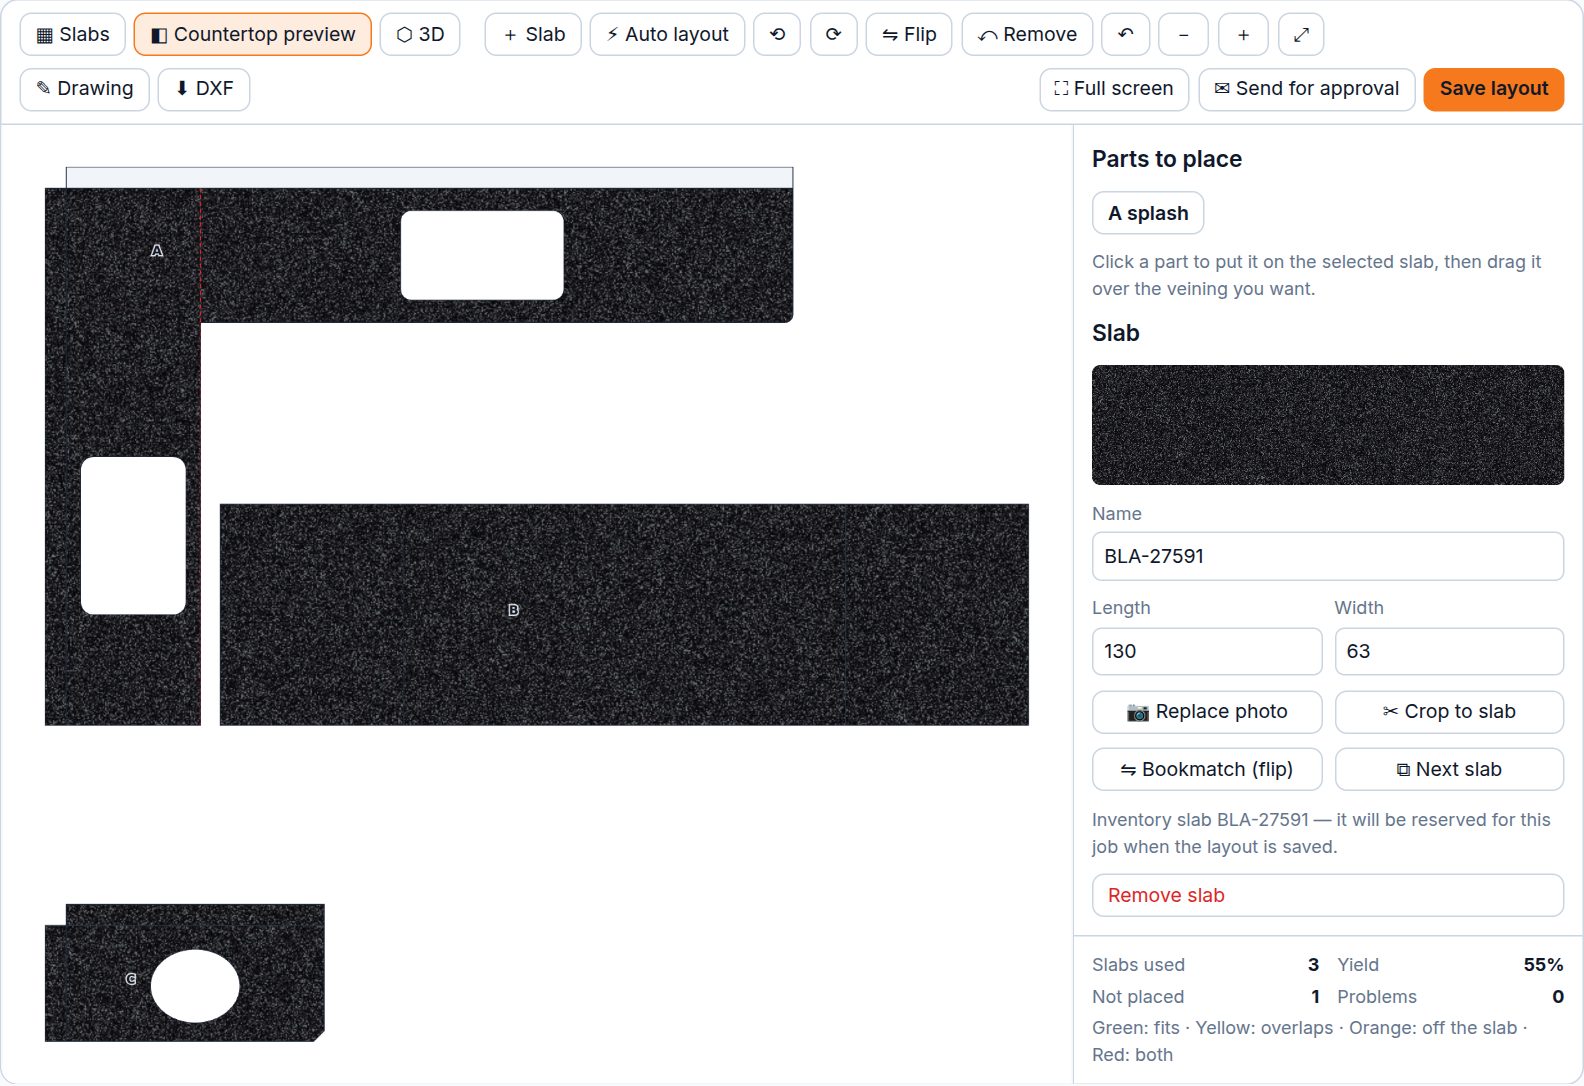
When it looks right, click Save layout. For a real-life view, switch to ⬡ 3D. See See the countertops in 3D.
Good to know: The preview only shows what the photos show. Natural stone varies, so remind the customer that the real slab can look a little different from the photo.
Related
Still stuck?
Write to us and a real person will answer. [email protected]