
Auto layout and DXF files
Let SlabBoard place every part on the slabs for you, estimate slab count, import a DXF from your laser templater and export DXF files for your saw or CNC.
On the Premium plan, SlabBoard can do the first pass of the slab layout for you and talk to your fabrication software through DXF files. You import the templater's file into the drawing instead of redrawing it, and you send drawings and layouts to programming as DXF.
Before you start
- ⚡ Auto layout and the Nesting preview need the Premium plan (feature Automatic Slab Layout).
- DXF import and export need the Premium plan (feature Fabrication Integrations (DXF, templating files)).
- Auto layout works on the slab layout, which needs a saved drawing. See Lay the pieces on real slabs.
Place every part automatically
- Open the job (or quote) and click Slab layout.
- Add the slabs you want to use, with photos, if you have them. Otherwise SlabBoard adds slabs as copies of the first one.
- Click ⚡ Auto layout.
- Read the status next to the buttons:
- "Auto layout done — fine-tune by dragging": every part has a spot.
- "N part(s) are bigger than the slab: split them with a seam in the drawing": add a seam to those pieces and try again.
- Drag parts over the veining you want, then click Save layout.
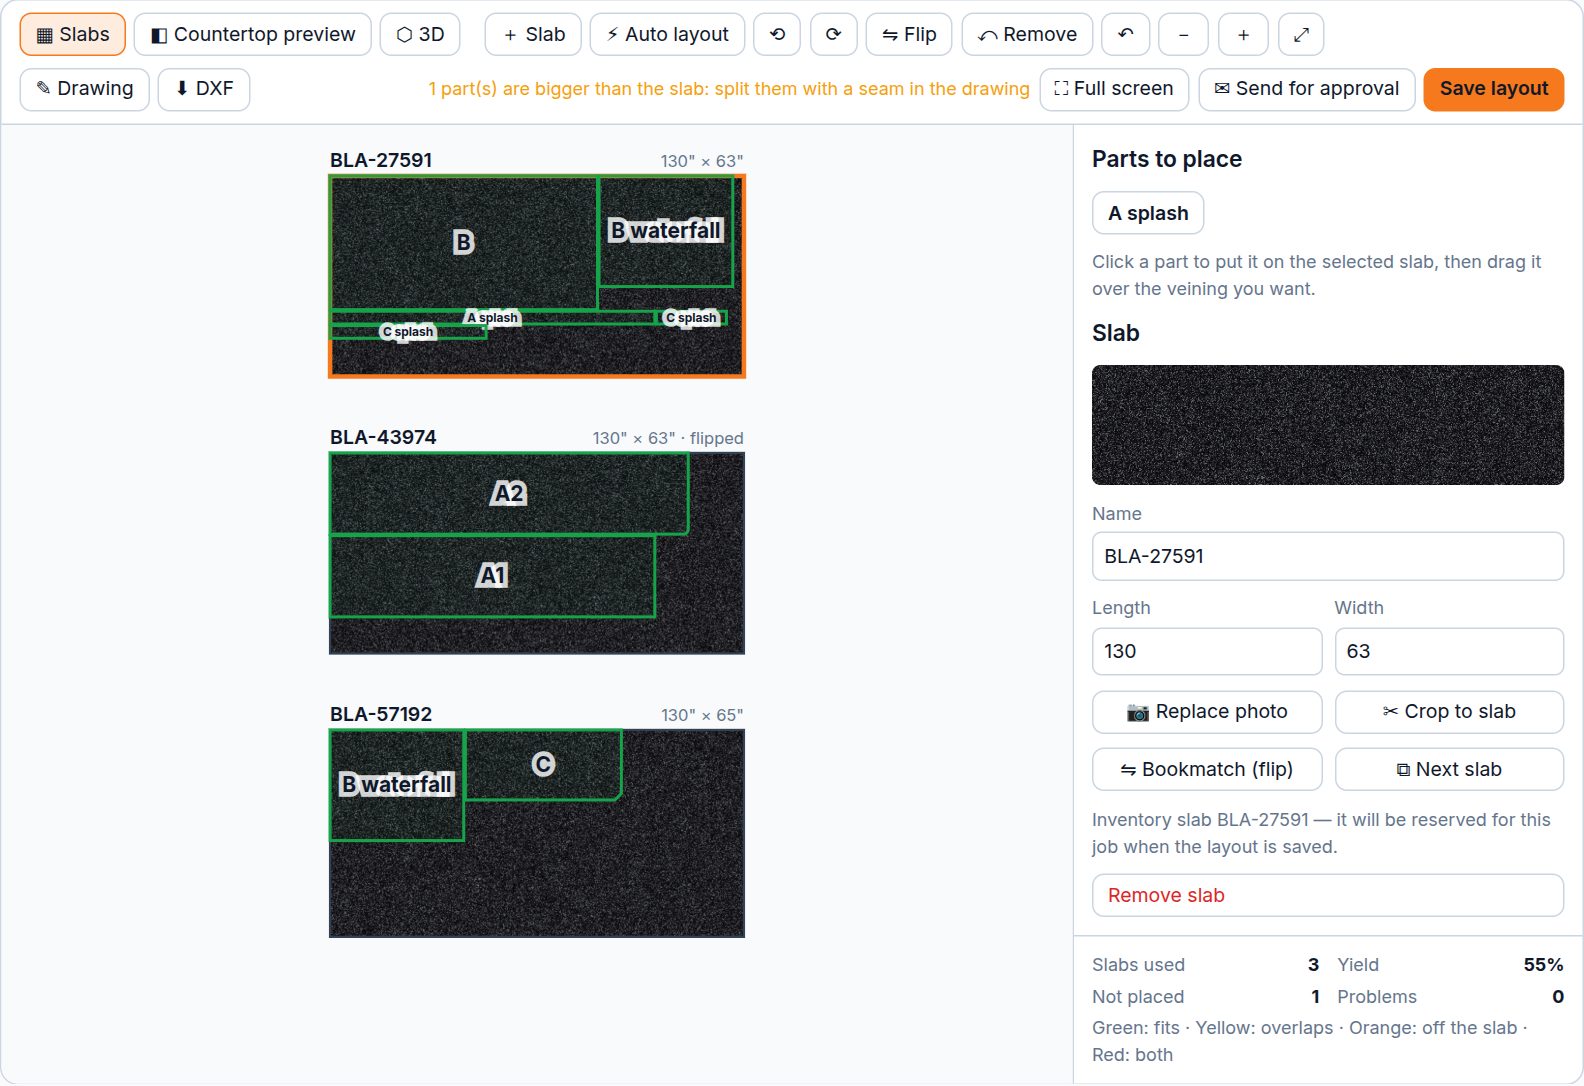
How it places parts:
- Biggest parts first, turned 0° or 90°, with a ¼" gap for the blade (kerf).
- When it needs more slabs, it adds copies of the first slab (same size and photo) named "Slab" plus a number, every other one flipped. These copies are not linked to inventory. Unused generic slabs are removed. Inventory slabs and the first slab stay.
- It packs by the rectangle around each part, so L-shaped pieces may use more stone than a hand layout.
- It doesn't look at the veining. Always check seams and grain by hand before you send the layout to the customer.
Important: Auto layout replaces every placement already on the slabs, including parts you placed by hand. If you didn't mean it, press Ctrl+Z (or ↶) right away to undo.
Estimate slabs before laying out
On a job, click the Slabs & shop tab and, in the Slabs table, click Nesting preview. It places the job pieces on standard slabs with a ½" kerf and shows how many slabs you need and the average yield. Pieces larger than a slab are listed in red: they need a seam or a jumbo slab. Use it for a quick count. It doesn't save anything.
Import a DXF into the drawing
- Open the drawing of the quote or job.
- Click ⬆ Import DXF and pick the file (up to 20 MB) from your laser templater or CAD program.
- The status shows "Imported N piece(s)". The new pieces are added below what's already drawn.
- Check each piece, set edges and cutout items, then click Save drawing.
What gets imported: closed outlines become pieces, closed shapes inside a piece become cutouts, and small circles become faucet holes. Lines, arcs and polylines are joined into outlines. The file's units (inches, feet, mm, cm or m) are converted to inches.
If something is skipped, the status says why. Common cases:
- Blocks are not imported. Explode them in your CAD program first.
- Outlines whose ends don't meet are skipped. Close them and import again.
- "No closed shapes found in the DXF" means nothing could be turned into a piece.
Good to know: To just keep the templater's file with the job without importing it, use the job's Field → Template files tab. That is on every plan.
Export DXF files
| File | Where | What it has |
|---|---|---|
| Drawing DXF | ⬇ DXF in the drawing editor (quote or job) | Pieces with curves, cutouts and seams |
| Slab layout DXF | ⬇ DXF in the job's slab layout | Every slab with its parts where you placed them |
| Pieces DXF | Export DXF in the job's Pieces tab | Each piece as a plain rectangle |
Important: ⬇ DXF exports what was last saved. Click Save drawing or Save layout first. A quote's drawing DXF is available only after the drawing has been saved with pieces. Quote slab layouts have no DXF export.
Related
Still stuck?
Write to us and a real person will answer. [email protected]